Tuesday, January 15, 2013

3 BASIC STEPS IN COLORING A MANGA CHARACTER DESIGN

Last time, we discussed about how to draw a manga head.  And the last picture I have inserted on that  article was the final draft.  In this topic, we will be discussing the steps on coloring a manga character design.

In my head I've got loads of ideas about novels that I wanted to create , and hopefully, publish.  Even for free.  I just wanted to make them as long as my heart's contented.  I just don't have the chance to make them possible YET, but I've already written some of the scripts or plots on my notepad.  So I should probably start making one this year.

One of the characters that I have designed is Kyon.  He is the lead male character from "Morning Glory".  It's genre should be romance, fairy tale, comedy and josei manga.  He is the one that we've drawn on the previous blog, and now we will discuss how to color Kyon.

Step 1  DRAW THE CHARACTER DESIGN.  We have drawn the character design on the previous blog, and this is how he looked like.

Step 2  
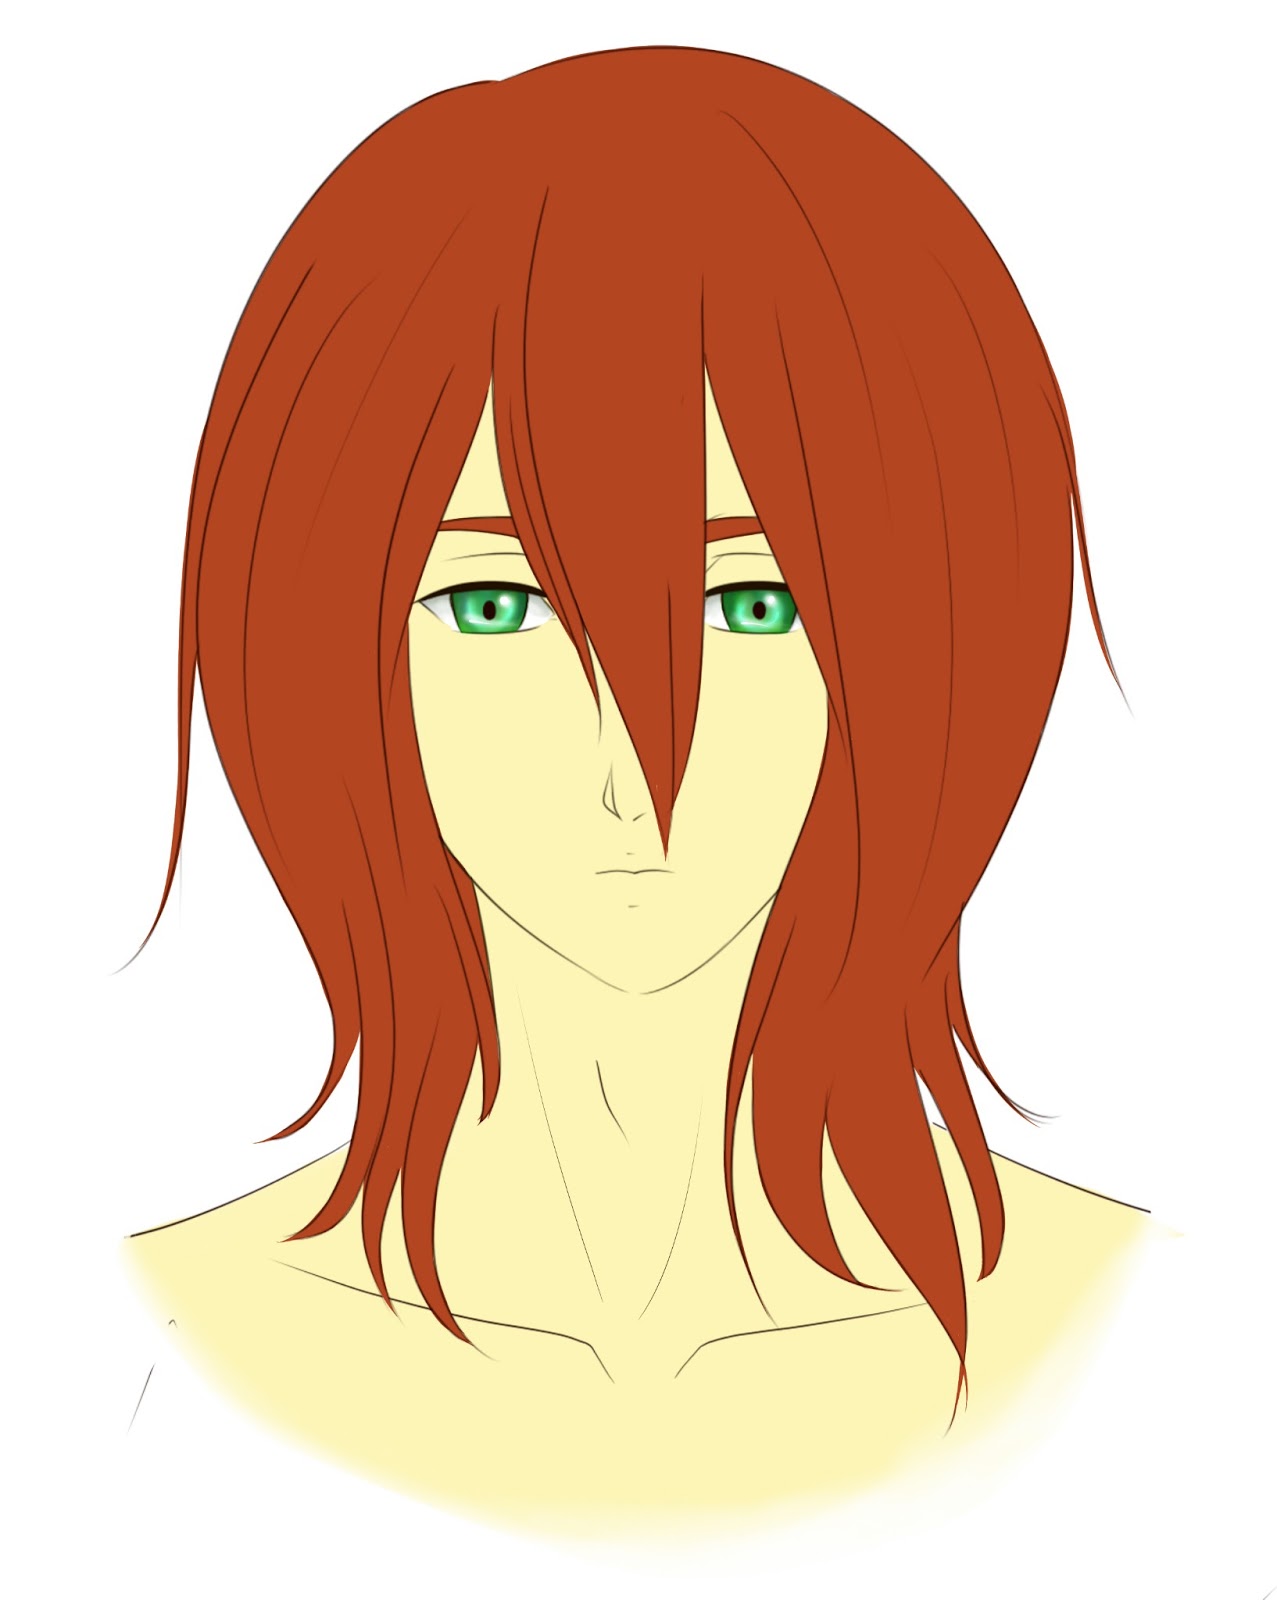
BASIC COLORS.  Add another layer and start the coloring with the basic colors.  Burnt sienna for the hair and brows.  Green for the eyes.  Flesh for the skin.
Step 3  PUT THE SHADOWS AND HIGHLIGHTS.  I always add another layer for each action that I make.  I added another layer here to put shadows and highlight on the eyes.
Next is the shadowing for the skin.  Always check if the darker shades on your drawing is appropriate for its lighting.  Always remember to put one source of light and make sure that it is shown on the drawing.
Putting shadows on the hair is more delicate than that of the skin tone.  The hair should always show its volume, and the highlight should always be in line with the strands of the hair.  I always start with the shadowing.  Here shows the darker parts of the hair that already gave the volume of the hair.
Next are the highlights.  You can see that there are parts with the bigger but softer highlights, and there are also parts with highlights that are thinner but sharper.  These two types of highlights shows more volume to the hair.  Therefore, shows the hair strands, manga style.
Hope you enjoyed reading!  'Til next time! :)

DRAWING A MANGA HEAD


It's been a while since I last made the HOW TO DRAW MANGA blog.  I've discovered a paint tool that I am using in creating my graphics.  It is called SAI.  Recommended by a friend who is also a graphic artist.  It helped me a lot in improving my skills in drawing anime characters.  And it is VERY EASY to use,  user-friendly and flexible.  Here is an update for the HOW TO DRAW MANGA blog.

I always wanted to draw a fan art about the famous anime characters that are also my favorite.  I also figured that that maybe a way for me to have more views, likes, comments or critiques about my works in the net.  But I somehow couldn't manage to give a time in making one.  My heart just doesn't feel like doing it that way.  Porbably in time.  But not yet now.

So I have been spending my drawing practices by making my own character designs.  It is a lot more fun and it is easier to make your own character designs than just copying the ones that already have been created by other famous artists.  It may give you less fame, but it surely feels  more worth it!  Creating my own character designs makes me feel like they are my very own children.

Here is a step-by-step tutorial for you to draw a manga head.  Later on I'll also post another blog about coloring this character that we will draw.  Get your drawing tools ready, and let's get started!

Step 1  DRAW THE OUTLINE.  I always start a drawing by putting an outline.  And circle is my starting point.  Lightly draw a circle.  It doesn't have to be a perfect circle.  Just ease your hand and draw a circle.

Then, draw the lower part of the head which would look like a cone shape.  The circle was the outline for the upper part of the head.

After drawing the circle and cone-shaped outlines, notice that it formed an egg shape as the head's outline.
Draw a cross line at the middle of the egg-shaped head outline.
Draw another vertical line on the upper part of the egg-shaped head outline.
Estimate the sizes of the facial features and add their outlines.
This is the finished outline of the head.  But to make it easier for you to see, I included here a blue lined drawings as to what feature should be placed on the face's outline.
Step 2    DRAW THE ACTUAL LINES OF THE FACIAL FEATURES.  I added another layer to draw the actual lines of the drawing.  Let's start with the eyes.
Draw the eye brows.


Continue with the nose.
And then, draw the mouth.

To check if the drawing of the face is symmetric, temporarily un-show the first layer.  This is how the second layer look like without showing the first layer.
Step 3  DRAW THE HAIR.  Add another layer for the hair.  Start with the bangs.  This never fail to help me draw the character faster and easier.  Drawing the hair starting with the bangs helps me anticipate how I want the hairstyle to show.  Whether or not it's short, the volume of the hair, would it be curly or straight, etcetera.

 
Continue drawing your desired hairstyle.  But still, don't forget to base it on the head outline, or else the hair would look plump as if it's a wig.
Add as much layers as needed.  I remember reading a comment on a video tutorial that I was watching months ago, one of the netizens criticized adding the layers.  He asked "what's the point of using the layers?! it's not important"  Believe me, guys!  Layers in drawing a character design using a computer paint tool ARE VERY IMPORTANT.  It will help you speed up the drawing by avoiding too much errors.  Without using the layers, you have to go back from scratch by erasing the lines again one by one and re-drawing the correct lines, in order to correct the error again.

While when using layers, you can easily delete the specific layer and the erroneous drawings will be automatically deleted as well.

Step 4  ERASE THE UNNECESSARY LINES.  Erase the lines that are not needed.  Since we've got Layer #3 for the actual hair drawing, we will be erasing the lines on the Layer #2(facial features outline).  But only the parts that are behind the bangs.
  
Step 5  SCAN THE DRAWING.  Scan the drawing using your eyes to see if you're already satisfied. As I check on this character design, I saw that there is something missing.  The pupil.  The pupil is very important in drawing the eyes of a character design.  It shows more feelings or emotions being conveyed by the character that you are trying to make.

Notice on the previous drawings that the eyes shows dullness, but as we add the pupil on each of the eye it shows a soul on the character.

Step 6  COLOR THE MANGA CHARACTER DESIGN.  Another detail that adds soul to the character design is its color.

Here is the final draft of our character design.  I hope you enjoyed reading this article.... :)  Looking forward to creating another one.... :D  Ganbatte!!!!!